

Goodnotes for Beginners is one of the most important part of digital planning. Today’s article is going to be so helpful if you were thinking about planning digitally. If you want to get started note-taking digitally this year. I’m going to be your best friend. I’m going to show you everything you need to know to get started. And I’m going to make it as easy to understand as possible.

So we are going to be using Goodnotes. It’s actually super user-friendly. Once you’re in you are never lost. You’re never confused. Everything is very straightforward and easy to use. Although it’s really simple there are a lot of kind of hidden features that you might not know about. Different things that are going to up your productivity. And I want to share those with you today as well. We’re going to go ahead and get started.
The tools I’m using today, are my apple iPad. It’s just the basic iPad. It’s not the pro. It is 7th generation. I’m using an apple pencil and I’m using the most current version of Goodnotes.
How to use Goodnotes
Let’s launch the Goodnotes app. When you launch Goodnotes, it immediately takes you into your documents section. You can organize this page pretty easily with different folders like I’ve done here. You can change the list view like this. For me I find that when I’m moving things around, this view is helpful. You can also organize them by name or by type. For my teacher planner, I actually put an asterisk here so that it would always be at the front. It would be the first document when you tap new.
You’ll get these options. So the basic option is just your notebook. This creates a place for you to take notes. They give you all of these templates. You can change it portrait landscape. If you’re writing like I am. This is the way you prefer to write you might want to change it to landscape.
You can also change the color of the paper from yellow paper to white paper to dark paper. Dark paper looks really nice visually to write on. I know a lot of people who prefer to take their notes this way. After you’ve created a notebook you can just hold it and drag it into a folder. Or you can duplicate it move it or move it to the trash. If you accidentally delete a planner or a page, what you can actually do is go to settings and visit your trash bin. It shows all of your deleted work. So you always have kind of a backup plan. Sometimes if you need your Goodnotes to be a little bit quicker, it might be helpful to empty your trash bin.

Goodnotes for Beginners: The Interface
Now let’s take a look at the interface. So I’m just going to open my half year planner and it brings me back to where I was last. For example if I was on this page and I exited back and tapped in, it would bring me back here.
The way you can view everything in your notebook is by tapping the thumbnails foursquare button right there. It shows you what page you’re on. It’s highlighted in blue right here and you can scroll through your entire document and find the place you want to get to. Another thing that you can do is add favorites. So you can bookmark tabs and it’ll take you there.
Search Function
The next tool we have up at the top is this magnifying glass and that is our search function. So if I wanted to search video it would tell me where I have video in my planner. It actually pulls up handwriting and it shows you the context of what you’re searching. So these are all of the places that I wrote video in my planner. If I tap it, it takes me to the page and highlights where it found the word. You can also come down here to these arrows and it will show you all of the results.
So we talked about thumbnails, search feature and bookmarking feature. And next one is our exporting feature. From here you can export a single page. It would just export this page that we’re on. You can export your entire notebook or you can print. If I tap export this page, it lets me choose pdf image or Goodnotes. You can save it as a pdf you cannot edit the document anymore. If you save it as an image, it’ll save it as a jpeg. It’s lower quality than a pdf. And if you save it as a Goodnotes file, all the writing that I’ve done on this page will be preserved. So I can come back and edit that writing.
Export all gives you those same options. And then if you tap print, you can print just a single page or you can print the entire document.
Adding a new page
So we’re currently in my planner and I have this monthly dashboard. But there’s only one page of the dashboard and then it takes us right into our calendar. If you tap this button up here, it’ll actually let you add a page into the planner quickly and easily. So if I tap current template you can see that it took this template for the page that I’m on. And it allows me to import. It just like that the alternative way to doing. That is hitting the thumbnails button tapping this arrow and duplicating the page.
So you can see that when we duplicate the page from the thumbnails menu it actually preserves all of your writing. If you wanted to go in and clear all of that writing you would just need to tap your three dots for your menu and then tap clear page. So this add page function would allow you to add a page after your current page. So for example it would add it right here or it would allow you to add it before the current page. If I selected that option it would put it here.
We did discuss a menu a little bit. There are a few more things that you can mess with. I for the most part don’t. If you wanted to delete a page you would go back to your thumbnails click on the arrow and select move to trash.
Page view on side by side
Let’s say you want two pages of the same document to be side by side. So let’s say I want to go into my weekly planning but I still want to see this monthly dashboard page. All you need to do is tap your thumbnails find the page that you want to be side by side. Let’s say it’s this one. Tap the arrow and select open a new window that pulled our new page over on the right side. I’m going to exit out of this thumbnails option, so we still have our original page. Then we have our new page that we can use as well. All of the functions of both pages are still preserved. You can write on both pages. You can still navigate the tabs. It just allows you to be a little bit more productive. Then when you’re done you can swipe it away.
Editing Mode
So currently the ribbon across the top is white which means, I am not in editing mode. If I tap on any of these links here, they’re gonna go through. However if I tap this pen button, it’s going to bring up my toolbar and now I can no longer tap those links in fact it’s actually writing. You can see here the symbol is a pen with a mark through it, that’s telling me when I tap that it’s turning my pen off. If I want to write again I can tap it back. When you’re in this mode and you want your document to be full screen all you need to do is tap one time and you’re full screen. If you tap again it brings back your ribbon or you can tap this arrow. This is most important thing for Goodnotes for beginners.

Goodnotes for Beginners: Toolbar
Now let’s get into our toolbar. This is what you’re going to be using most of the time. You have a zoom window here, which as you can see this window shows what’s in this box. Then you can drag it like that or you can use your fingers. You can control how big this box is. For me I find this more useful if my iPad is in portrait mode. The window just seems to be a bit more user friendly. When I’m in landscape mode I don’t find the zoom feature as useful, but you might.
Pen
The next tool we have here is the pen and you can see the bluetooth symbol because I’m actually using my apple pencil. There are other stylus that you can use and it’s connected via Bluetooth. Your default pen is the ball pen, you can tap over to the fountain pen here’s the ball pen and here’s. The brush pen and that’s more of like a calligraphy style if I write with the brush pen. If I write with the brush pen it actually picks up the pressure of my apple pencil. I don’t know if other stylists do this, but the apple pencil the tip picks up pressure so you can control your brush strokes.
Also under the pen we have stylus and palm rejection. Which allows you to choose your writing posture and the sensitivity. That way if you’re writing it’s not scrolling back and forth. So my palm is actually touching the notebook right now but it’s not moving because it thinks I’m writing. Pen tool is another tool that extremely important for Goodnotes for beginners.
Eraser
The next tool we have is the eraser and if you tap it again you’ll actually see the eraser options. One that I really like to use is the erase highlighter only option. So if I turn that on, so if I have a to-do list for example, let’s say that I highlight it and then I move on to something else. If I wanted to go and erase the highlighting only I can make sure erase highlighter only is on. So here’s an example with it off, it erases everything. I’m gonna undo that and if you turn it on it knows just to erase the highlighter. That’s a really useful feature for me.
The other feature I like is the auto deselect. If you turn that on, let’s say I’m doing a lot of writing and I want to be really fast and efficient just like I would be with a normal pencil. When you’re writing normally all you would have to do is flip your pencil do a little erase and go back to writing. This auto deselect gives you that same function. If I have my eraser tapped with the auto deselect on, I can erase what I need to and it brings me back to the pen without touching anything.
So once again let’s say I’m writing I’m on a roll I’m trying to move really quickly I made a mistake. I can just hit my eraser and then as soon as I lift up my apple pencil, it takes me back to my pen. So I can keep writing. Another function you’ll see me use a lot is clear page. Most wanted tool for Goodnotes for beginners.
Highlighter: Goodnotes for beginners
Our next tool is our highlighter tool. Let’s just put it on a yellow, you get three default sizes. Here’s the small medium and large. You can change the color of your highlighter over here. When you’ve selected the pen or the highlighting tool Goodnotes gives you three colors to work with in your document. So I can change what colors I want. Highlighter is another tool that used for many digital note taker by Goodnotes for beginners.
These three colors to be. So let’s say I’m taking notes I have a color scheme. I have a way that I code my notes, I can choose those three colors up here. And they can be different for your highlighter. I’m back on the pen option. Here if I tap my color, you’ll notice that I have saved my own colors for my pens. These are colors that go along with my planner. In order to add your own color, all you need to do is press custom and you can type in the hex code for it.
So let’s say I want to add this muted orange color, it’ll preview it in this box right here. So I can see it. I just need to tap add to presets. It shows up right there. If I decide you know what I don’t like that color you can just tap edit, tap your color and tap remove color and it’s gone.
Highlighter: Line Thickness
Beside our custom colors, we have line thickness. So Goodnotes does have default line thicknesses here for you, but you can actually customize them to fit your own needs. You can adjust your thinnest line. Let’s say I like it to be 0.3. You can have a medium thickness which I usually do like to be 0.35 and you can have your thickest pen which I usually like to keep at 0.6. You can change these anytime. But it’s a really quick way to go back and forth between thicknesses if you want things you write to be bolded or for some other reason.
Shape Tool
The next tool we have is our shapes tool. And I use this tool all the time to create boxes, circles, lines, rectangles, and even ribbons just like that. You can also create arrows and irregular shapes. In your shapes tool you can change which pen you like to use. For me I just like the ball pen and you have the option of filling in your shape. So let’s say I wanted to draw a circle. It’s going to fill it in with the same color. So if I draw this pink one, it’s going to fill it in and it looks like that.

Lasso Tool: Goodnotes for beginners
Our next tool is our lasso tool and this is the most useful tool in the entire planner. You can do so many things with it. So I’m going to pull up a spread that I’ve already ridden on. So I’m going to deselect my pen and we’ll go to August we’re going to open up our tools once again and our lasso tool is selected. I have my lasso tool set to recognize handwriting images and text boxes. But you could turn any of these off. Your lasso tool will select anything it touches.
So if I wanted to select this entire first line, I need to make sure all of that is selected. And then I can tap inside the lasso and move it over. If I only want a certain part of that line to be selected I only select that much. Most important tool for Goodnotes for beginners.
Lasso Tool: Selecting Large Objects
If you have something larger like an image, you don’t need to surround the whole image. The lasso just needs to touch a part of the image so that can be kind of tricky if you’re trying to be very specific. So you’ll need to zoom in and make sure you’re capturing everything you want. So that you don’t accidentally grab a piece of something you weren’t intending to. I use my lasso to move things, but I also use them to resize things. Let’s say I want to add a couple of more bullet points to my to-do list. All I need to do is select everything in here and then tap once and it brings up your menu from here. I can resize make it a bit smaller and now I have room to do more.
Lasso Tool: Changing Colors
Another thing I can do is, let’s say there’s something really important that I want to change the color of. I could erase it and change the color of my pen and write it again or I could use my lasso tool. Tap it and hit color and from there it’ll change the color of my text. If you’ve already had your text highlighted. So let’s pretend that we did and you use your lasso tool and change the color. It’ll change the color of your writing and of your highlighter.
Lasso Tool: Converting into text
Let’s say you’re in a meeting and you’ve been taking notes and someone asks you to send them the notes. One thing you can do is use your lasso tool. Circle your notes, tap and hit convert. This will convert your notes to text. Then you can send it for me. I would probably choose to airdrop it or send it via messages. But you could also save it to your own files.
Lasso Tool: Copying & Pasting
Let’s say that I have things in my lesson planning pages that are the same every single week like these subjects. All I need to do is make sure my lasso is selected get everything that I want to copy. Tap it and press copy. Then when I get to a clean page, I can hold down and paste it in using that same method. You could also completely delete something. So let’s say our plans for Tuesday completely change, just tap and hit delete. Another lasso tool function for Goodnotes for beginners.
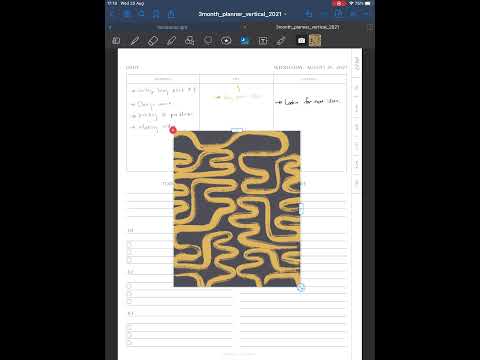
Lasso Tool: Taking Screenshot
Finally one of my favorite things to use the lasso tool for is taking a screenshot. So let’s say you want to send your plans to a co-worker. I have my lasso tool selected and I’m just going to draw a rough shape around my page. It doesn’t have to be perfect. You can see that’s a little squiggly. As soon as I lift up my pen and tap take screenshot it’s going to adjust it. So that the edges are clean and from here you can share it. From here you can airdrop it you can message it. You could add it to your drive. You could import it into another app or you could even print it.
Image Tool
Our next tool is the images tool and if you tap it it actually brings up your recent photos. If you tap the photo, it’ll import it into your planner. If you tap the images button again you’ll actually get the option to insert from your iCloud Drive. Other one is the camera button and it would insert a picture. Let’s say you’re at a meeting and you want to take a picture of the slide really quickly. You could use that button and it would import it.
Another way to decorate your planner for Goodnotes for beginners.
Text Box Tool for Goodnotes for beginners
Another feature you have is the text box feature. Again you can change the color. We’re just going to leave it black for now and all you need to do is tap on your screen wherever you want to start typing. Let’s say I want to start on Monday. Let’s read a book from here.
If I tap it to highlight the text I can make it bold, italic, I can underline it. I can change the color of it. I could change the size. You can adjust the box here and you can change the font. You can import your own fonts on your iPad, but you do need to download an app to do that. Let’s just say we like this cursive font. You can change the orientation of your text. And also you can change the background color which just kind of highlights your box. You could also add a border here. So it’s currently at zero points so if I add it and I change the color. You’ll be able to see that.
If you wanted to make custom headings you could do that. The padding just tells you the distance between the text and the border. So those are a couple of things you can do whenever you get away from it. Let’s say I want to add more text on Friday and I want to go back into this text. All you have to do is make sure you’re on the text and tap it.
Tools for Presentation Mode
Our next tool is mostly if you are mirroring your screen. So let’s say that we are in presentation mode and your iPad is being mirrored somewhere. You can have a little laser pointer for people to follow along with what you’re saying. Or you could circle things highlight important information. So that’s what that is for.
So that’s the very basics that’s everything that you need to get started planning digitally with Goodnotes. But there are a few more tips and tricks that you can use. Another great little tool for Goodnotes for beginners.
Goodnotes for beginners: Other Tips
So within Goodnotes you can have multiple windows up just like you would on a computer browser. If I open up a different planner, you’ll see that it adds it into a new window. So you can flip back and forth between different notebooks that you have quickly and easily.
We did already talk about the side side-by-side planning, so if I go to my thumbnails and drag a slide over to the side it can add it in that way. Let’s say I want this planner to the side I would just drag that tab and put it wherever I wanted. If you wanted to add in stickers into your planner you could go to your photos. Let’s just say we wanted to add it in all you would need to do is copy it and I’m going to make sure I’m on my lasso tool and I’m going to hold down and paste it. Best way to do multi productive windows for Goodnotes for beginners.
Let’s say you don’t have any stickers or any images saved in your camera roll. What you could do is go to the internet, so you can get any image from the internet into your planner without actually having to save it to your camera roll.
Outro: Goodnotes for beginners
So that’s just a basic intro and how to use Goodnotes. There’s lots of little things you can do. So you can take really cute notes. You can use the different features like the highlighter and just make things adorable. If you wanted to but i just wanted to show you the basics and how to use it.
Digital Planning on iPad & Planner Tips for Beginners
Those are all the tips I have for Goodnotes for beginners. That’s it super simple. Thank you guys so much for reading and watching if you decide that digital planning is something that you really want to do.
Feel free to check the my free planners and all of my digital and printable planners for you and because you stay till the end of the article. So thank you guys so so much happy planning and if you have any questions just let me know.